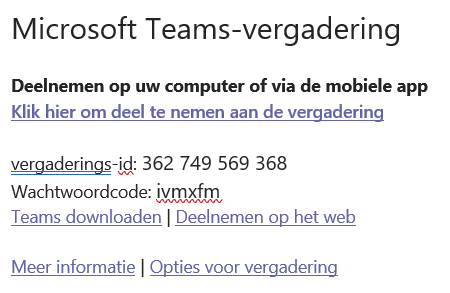
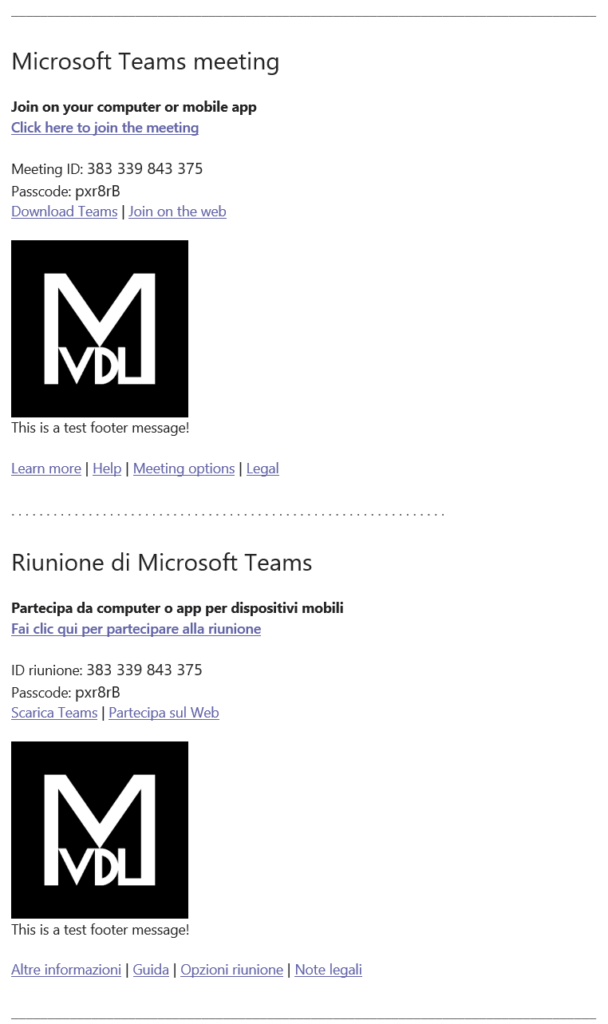
Without meeting policy
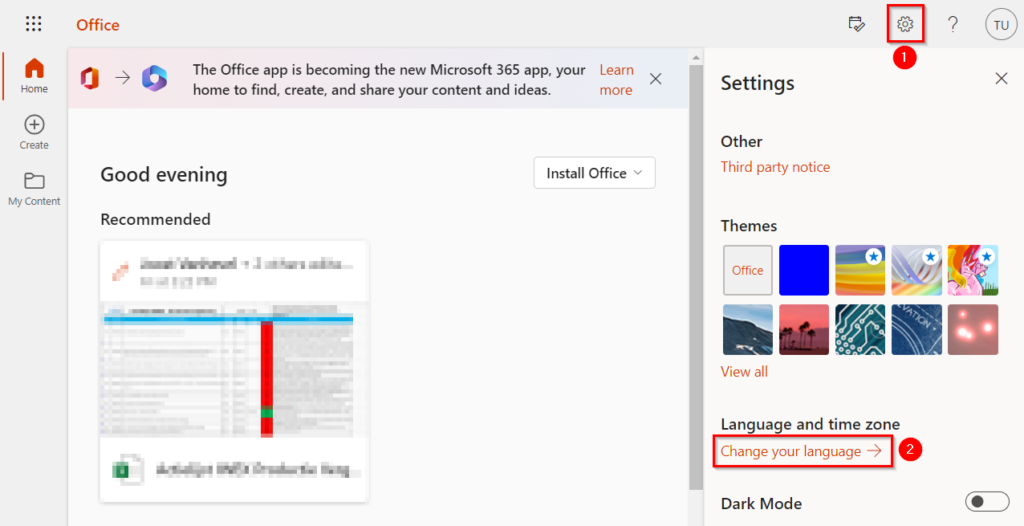
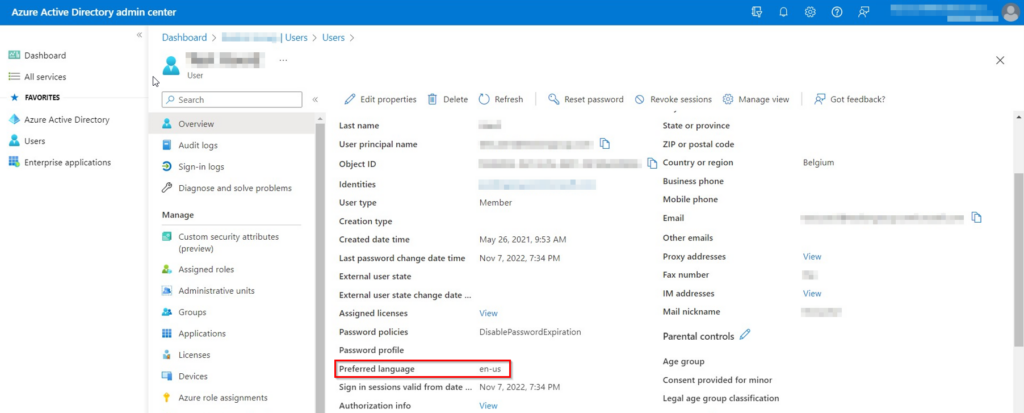
By default, most users have the Office Display Language set to their native language.
When sending out a Teams meeting request in Outlook, you will notice this meeting request will use the Office Display Language.
If you prefer the meeting request to be sent out in a different language, you’ll have to adjust your Office Display Language to the language you prefer for the meeting requests.
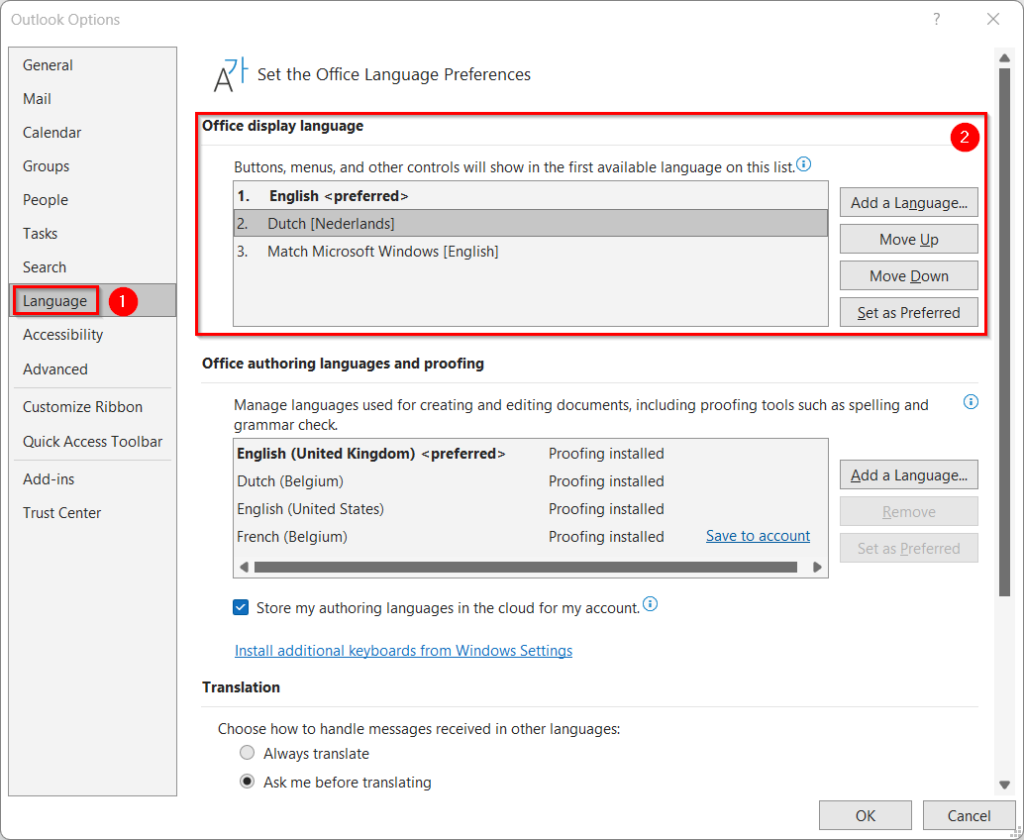
After changing the Office display language, restart Microsoft Outlook and restart Outlook.
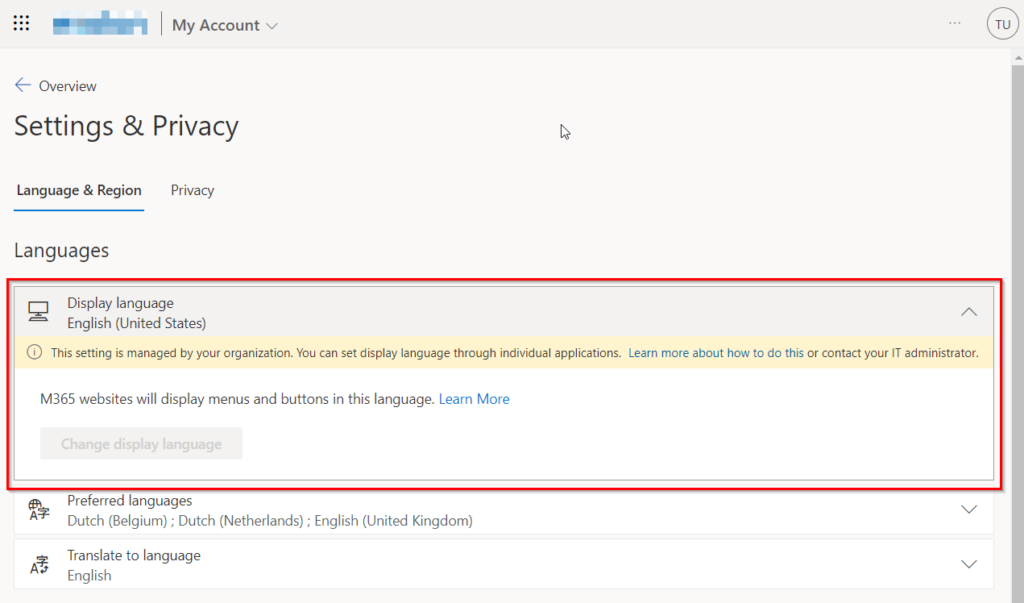
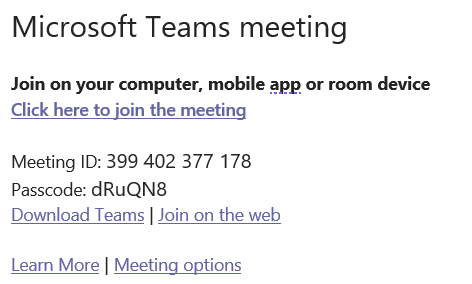
Note: After restarting Outlook, you’ll notice the first Teams meeting invite you try to create will still be in the language that was previously set.
Just close this meeting request and create a new one.
This one should be in your new Office display language.
Using a policy to set default meeting request language
In an Organisation environment, it might be more interesting if this can be managed by the system administrators.
It is possible to pin the language used for the meeting invites down by using a Teams Policy.
The option which needs to be set is sadly enough not visible in the Teams Admin Center, so we’ll have to adjust this setting through Powershell.
For this we’ll need to use the MicrosoftTeams Module.
Below you’ll find the PowerShell commands which I used to add the Teams Meeting invite in 2 languages when you click on the Teams Meeting button in Outlook.
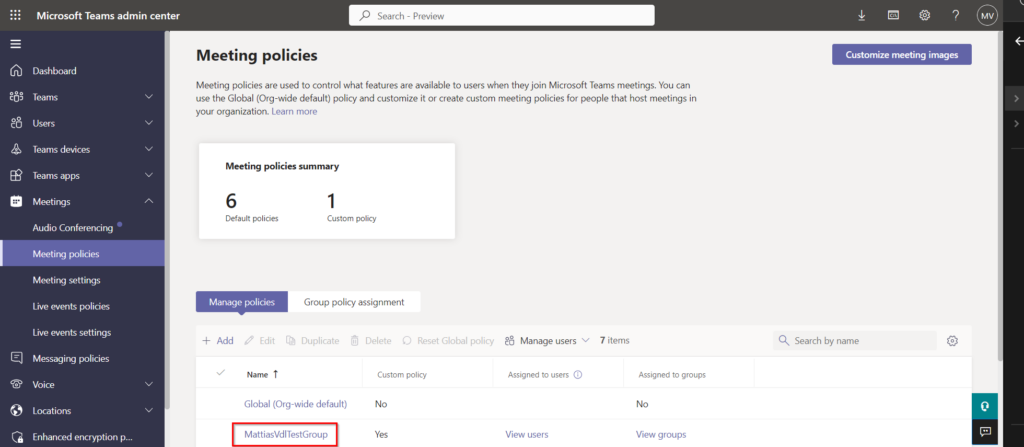
As this is a policy change, you will need to have a policy group to which you want to assign it.
I’ve created a new Meeting Policy (MattiasVdlTestGroup) just for testing functionality:
In case you haven’t installed the MicrosoftTeams module yet in PowerShell, execute the following code:
Install-Module -Name MicrosoftTeams -Scope CurrentUserWhen you’ve got the module installed, connect to your tenant using the command:
Connect-MicrosoftTeamsA pop-up window will appear in which you will have to select the account which has Teams admin rights.
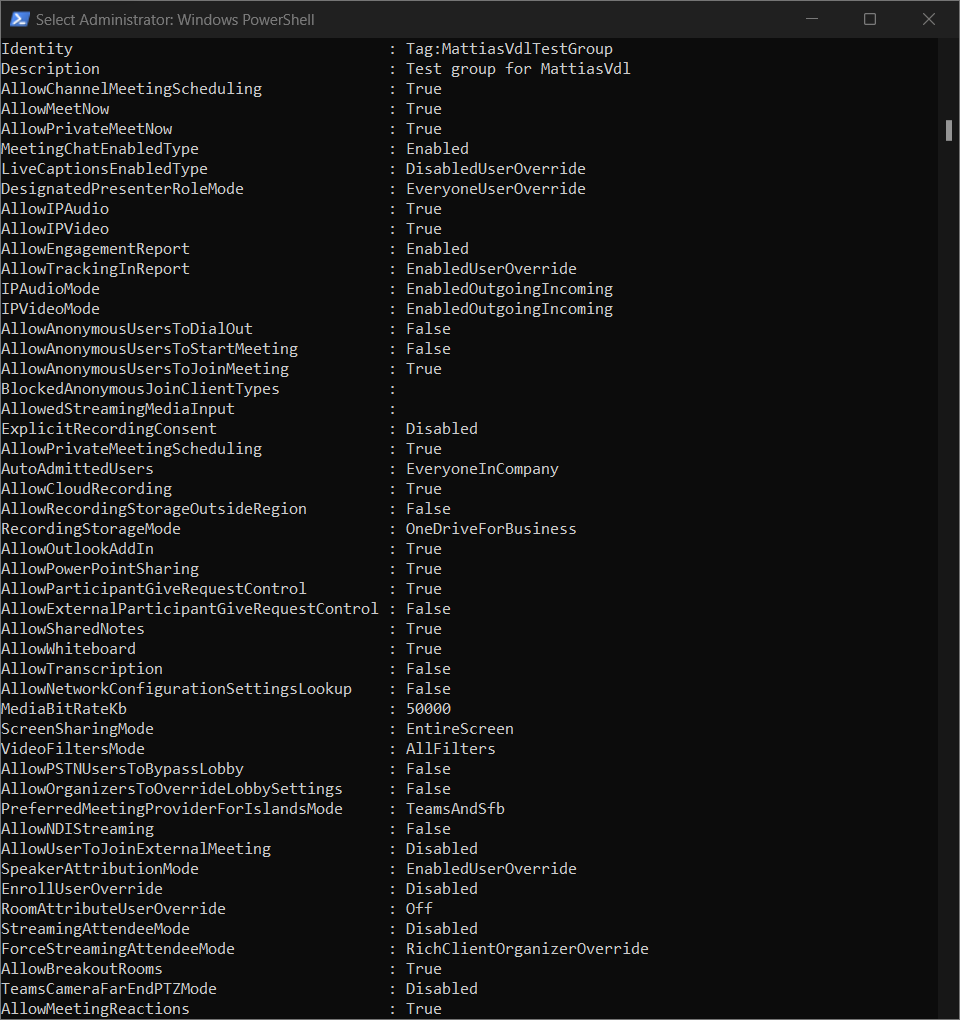
First I want to check to make sure the custom Meeting Policy I created can be found and what settings can be set for it.
For this I used the following command:
Get-CsTeamsMeetingPolicyThis gave me this result:

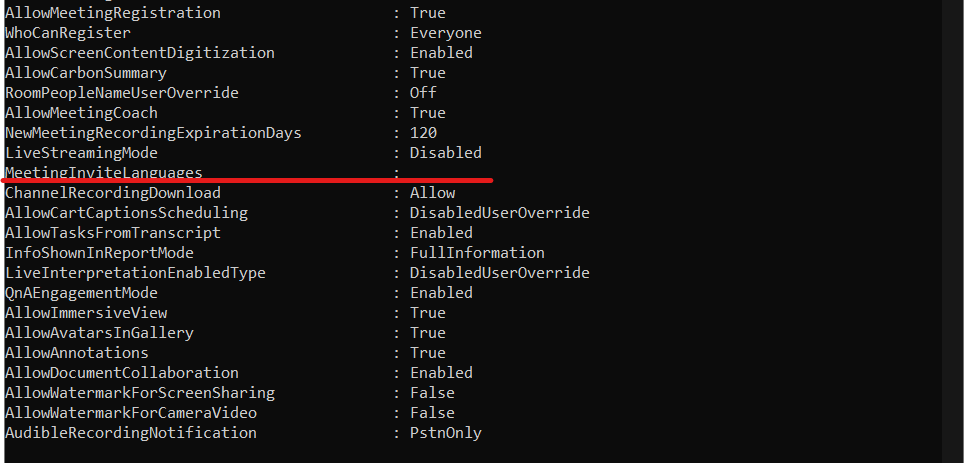
Next we want to the languages for the meeting requests.
In my case, I’ve set the language “en-GB” and “it-IT”.
This is done with the following code:
Set-CsTeamsMeetingPolicy -Identity "MattiasVdlTestGroup" -MeetingInviteLanguages "en-GB,it-IT"Language codes can be found here:
[MS-OE376]: Part 4 Section 7.6.2.39, LCID (Locale ID) | Microsoft Learn
Finally I wanted to assign this Meeting Policy to a custom security group I created in Azure Active Directory.
This is done in the Teams Admin Center:

The policy with the lowest number has the highest priority.
More information about this:
Assign policies to users and groups – Microsoft Teams | Microsoft Learn
Source:
Teams Meeting Invitation Language Set by Meeting Policy (office365itpros.com)