GitHub
mattiasvdlbe/Azure Active Directory/ExportLastSigninAllUsers
Why?
We wanted to do a clean-up of our Microsoft tenant.
All accounts which where inactive for a long time needed to be removed.
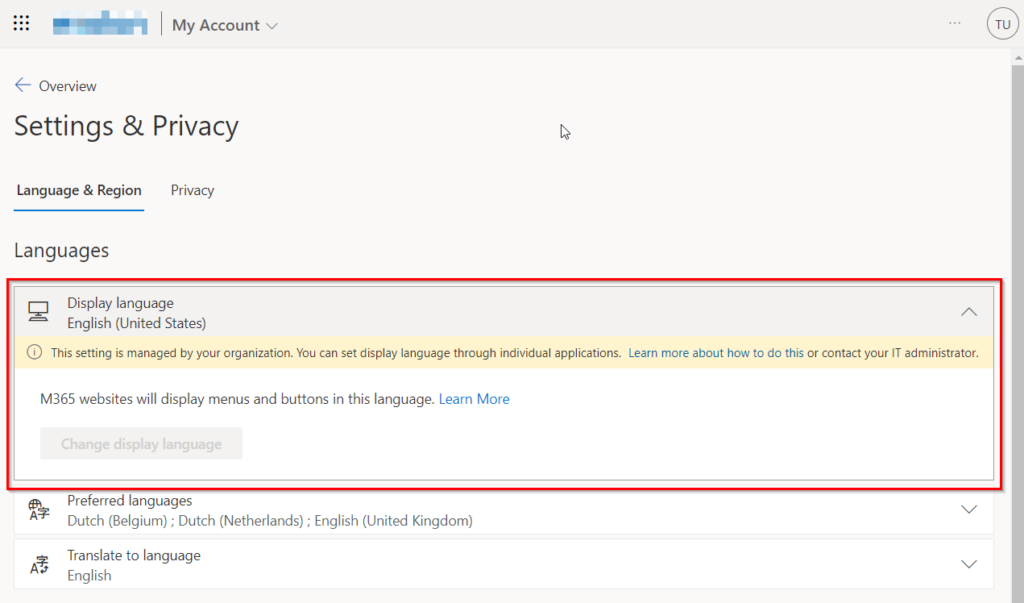
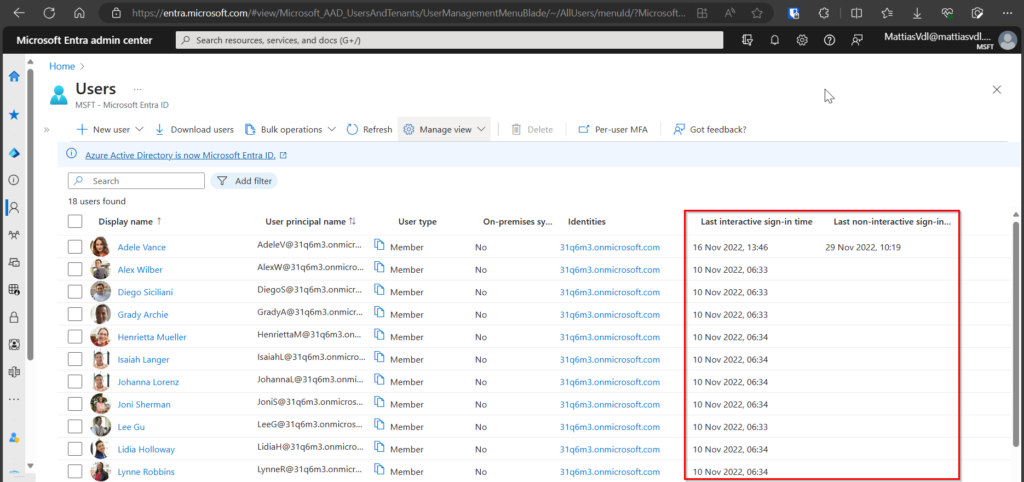
We noticed there was no way to make a quick export of the “Last sign-in” date of all users.
You can visualise these dates in the Microsoft Entra user page, but if you create an export of the users, this data is missing.
What?
Script which creates a .csv export containing the Last interactive and non-interactive sign-in for all users on the tenant.
The data in this export can be successful or unsuccessful.
How we got here?
After some searching, I found a way to export this data using PowerShell and the AADPreview module.
However, on further inspection, I noticed the export was limited to only 1000 records.
This was by far insufficient, as it only covered a couple of days of activity on our tenant.
The search continued.
In the end, I arrived at the Microsoft Graph as the easiest way to create an export of the list Sign-in data from the users in our tenant.
While exploring what I could export from the Graph, I found the correct data but noticed the data was paged, as it the number of records was to big.
You couldn’t view all records in one go.
Also the data was in .json format which wasn’t ideal.
While searching for a way to export all records to 1 .csv file, I came across this great response of “JanardhanaVedham-MSFT” on a post on the Microsoft Learn website.
The script he posted was exactly what I was looking for and worked perfectly fine.
Below I’ll explain in a bit more detail how exactly I got it to work.
How it works
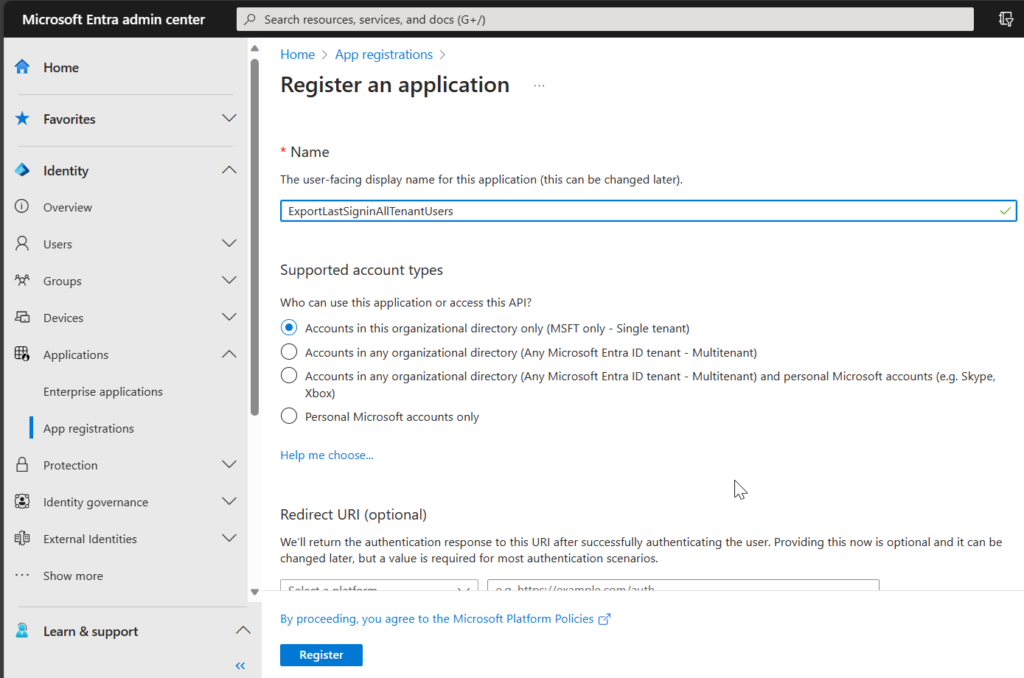
- Create an Azure App Registration
Specify a name for this app registration.
All other settings are set correctly.
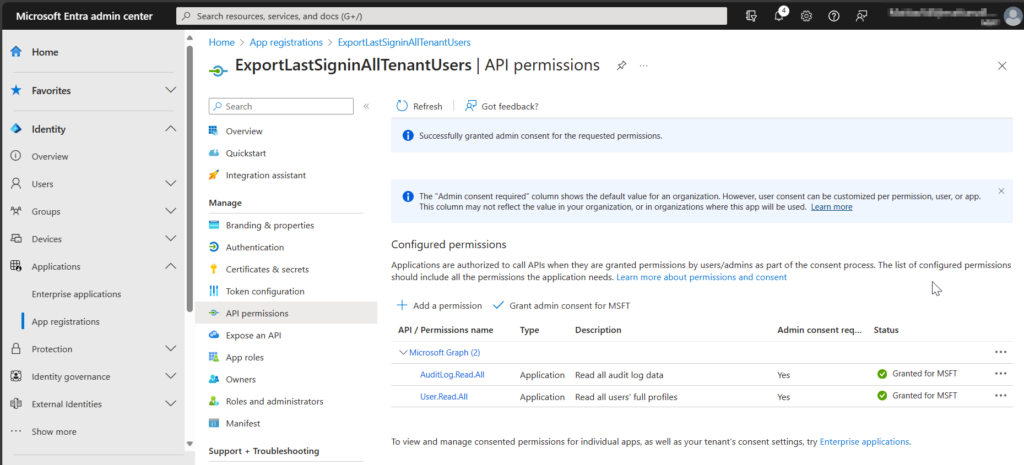
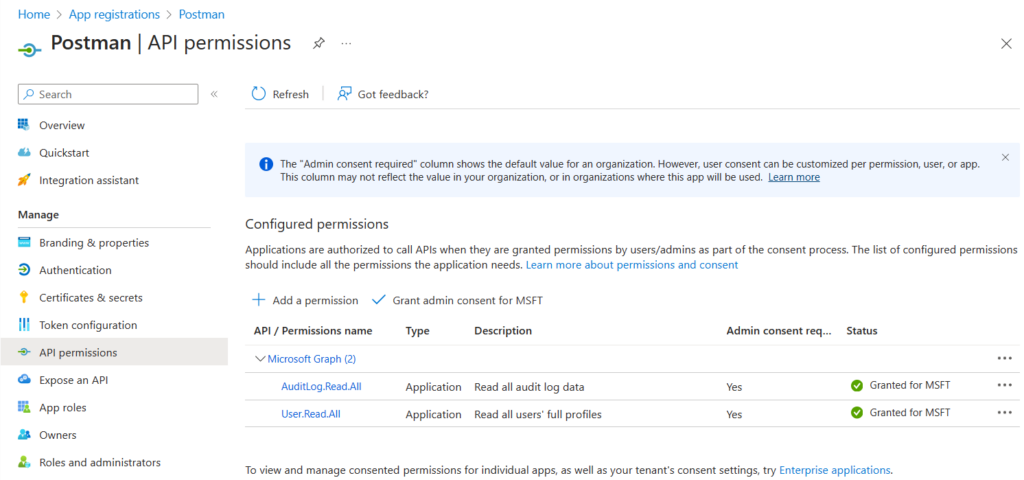
Specify the API permissions for this app.
You can delete the default “User.Read.All” permission with Type “User”.
Then add the following 2 “Application permissions”:
– AuditLog.Read.All
– User.Read.All
After adding these permissions you’ll have to Grant admin consent for MSFT.
For this you’ll need a Global Administrator.
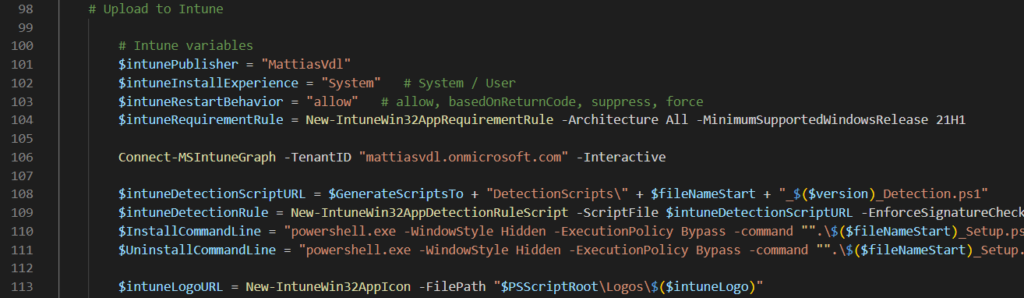
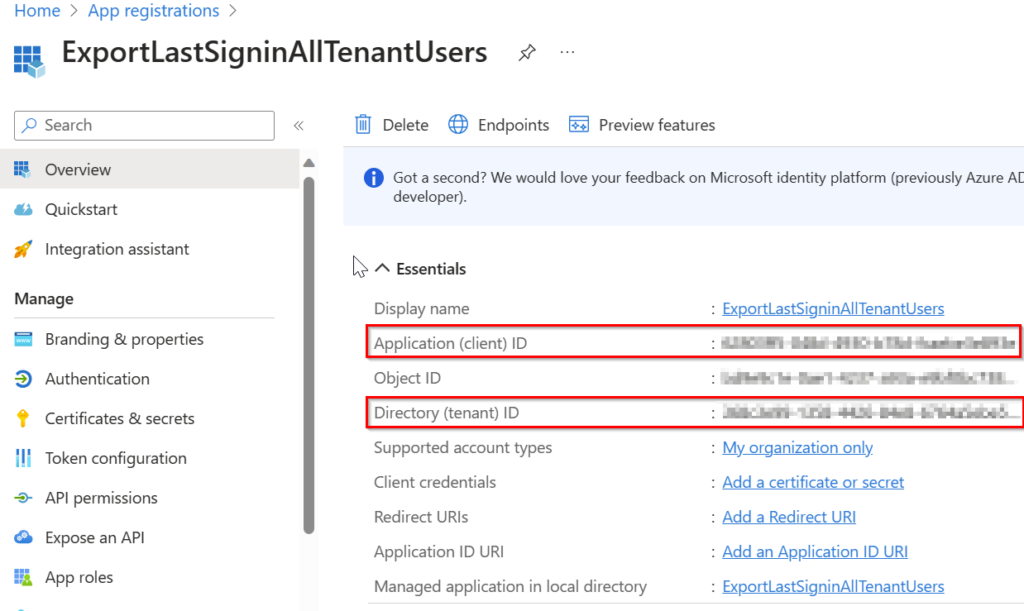
Copy the “Application (client) ID” and “Directory (tenant) ID” to the PowerShell script you can download on my GitHub.

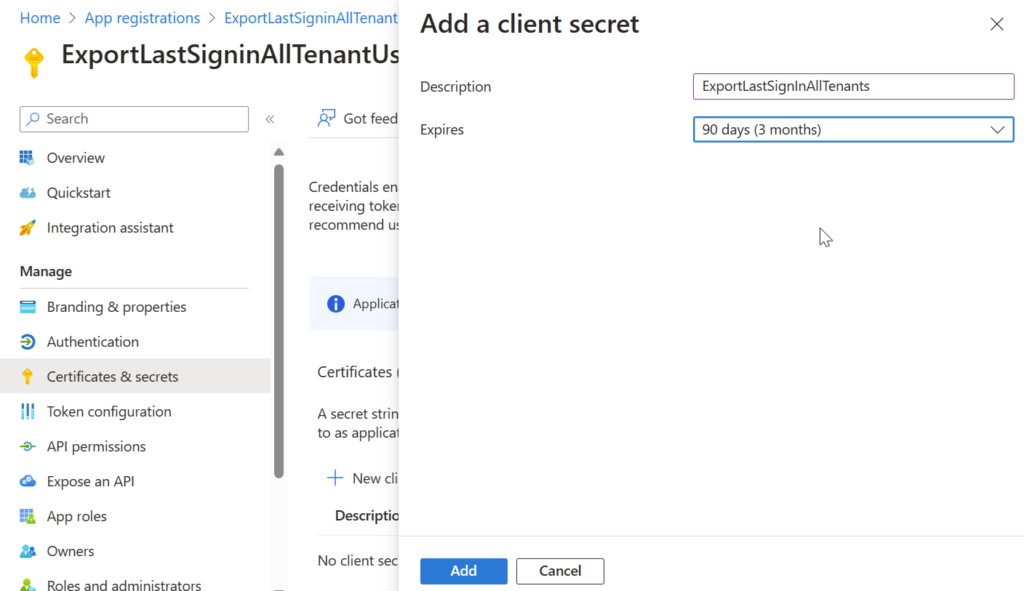
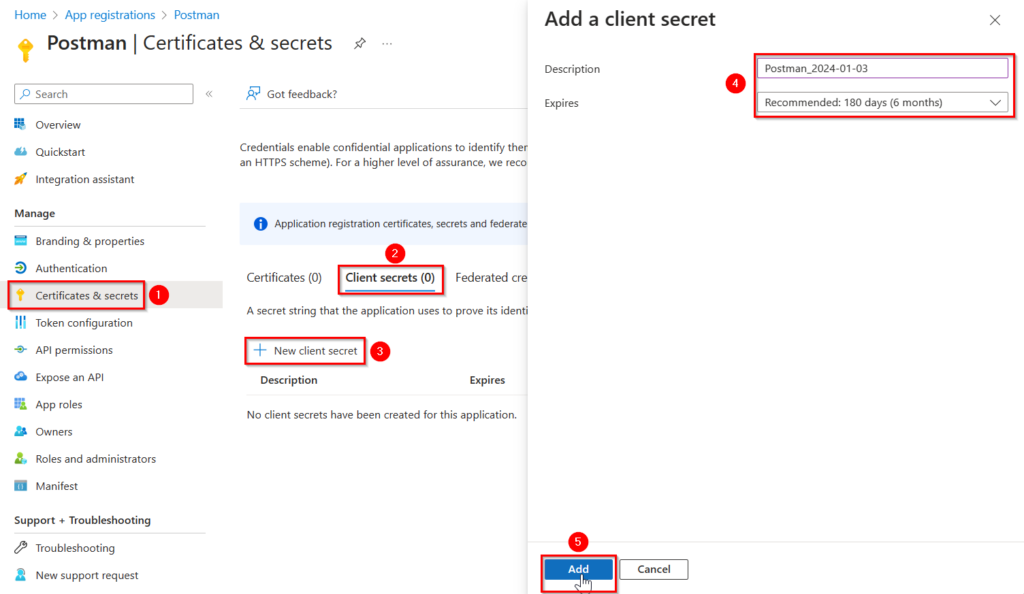
Finally, we need to create the App Secret.
Go to “Cetificates & secrets” and create a new “Client secret”
You can chose description and the time the secret will be valid.
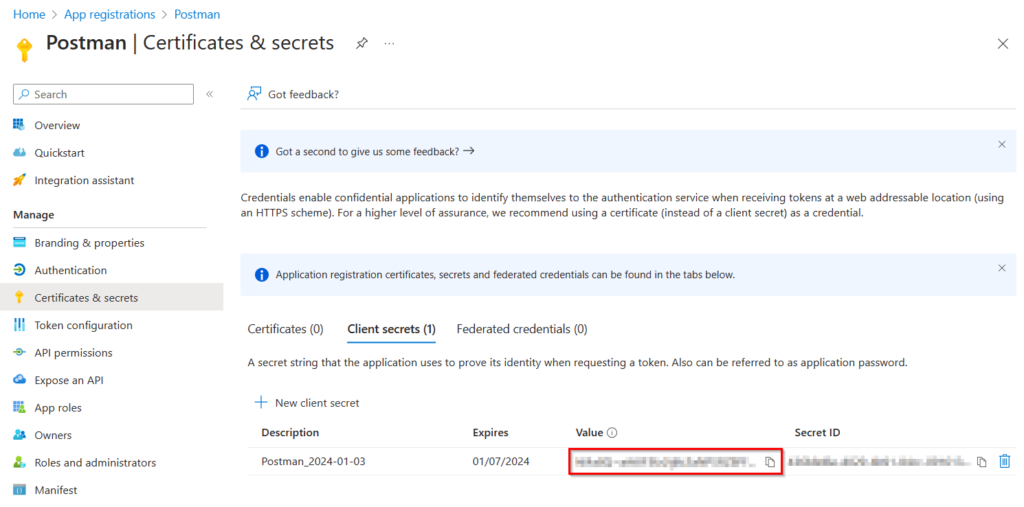
After creating the Client secret, you can copy the “Value” to the Powershell script, and afterwards, the script should be working.
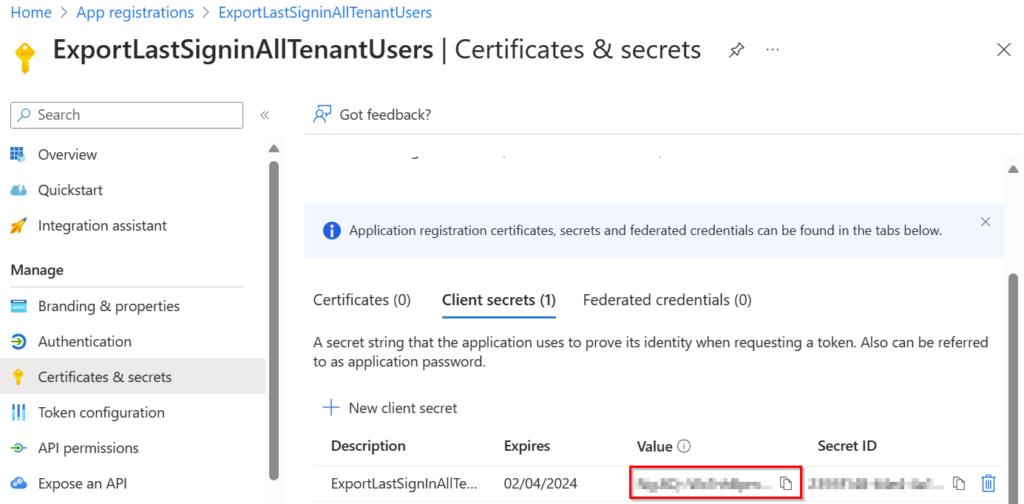

Make sure to copy the Client Secret immediately, as it will be hidden automatically after the admin logs off, and possibly after some time.
It’s not possible to retrieve this secret afterwards.
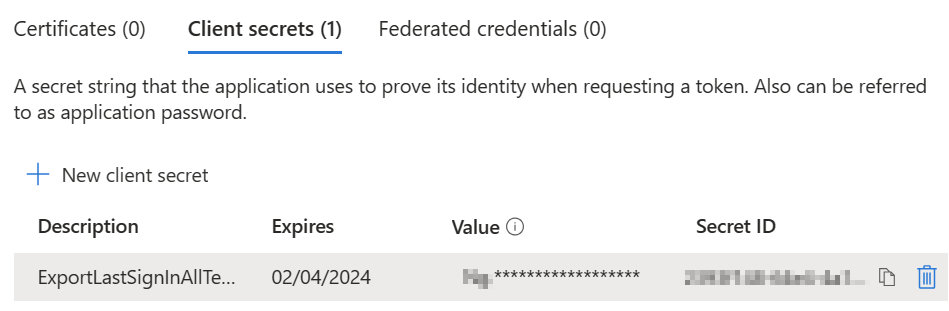
In case you forgot to copy the secret value, and it’s hidden, you’ll have to create a new one.
Also remember this secret is only valid for the specified period.
You will need to create a new secret after this period if you want to keep using the script.
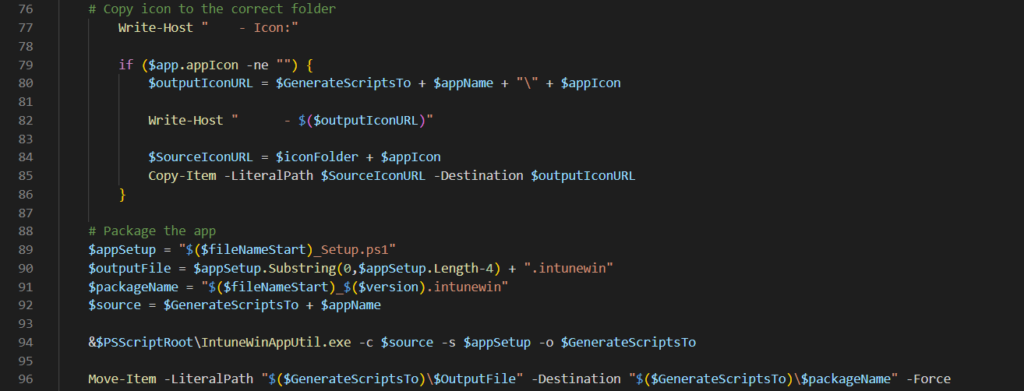
- Run the script now you’ve filled in the necessary Azure App Registration details.

You’ll find the export here:
C:\Temp\ReportUserSignin.csv- All set to open the report in Excel, or any other application you want to use to analyse or work with the .csv file.

Get this data through Postman
You can also access this data through Postman.
Below I’ll go through the steps to set Postman up and get this same export.
- First, Install Postman on your pc.
Postman API Platform
You can also use it in your browser, but you’ll need to perform an extra step then. This is explained well in the video Jeremy Thake made (Getting started with Microsoft Graph Postman workspace (youtube.com).
I’ll cover how I got it to work in the desktop version. - Once you’ve got Postman installed, it will ask you to create an account.
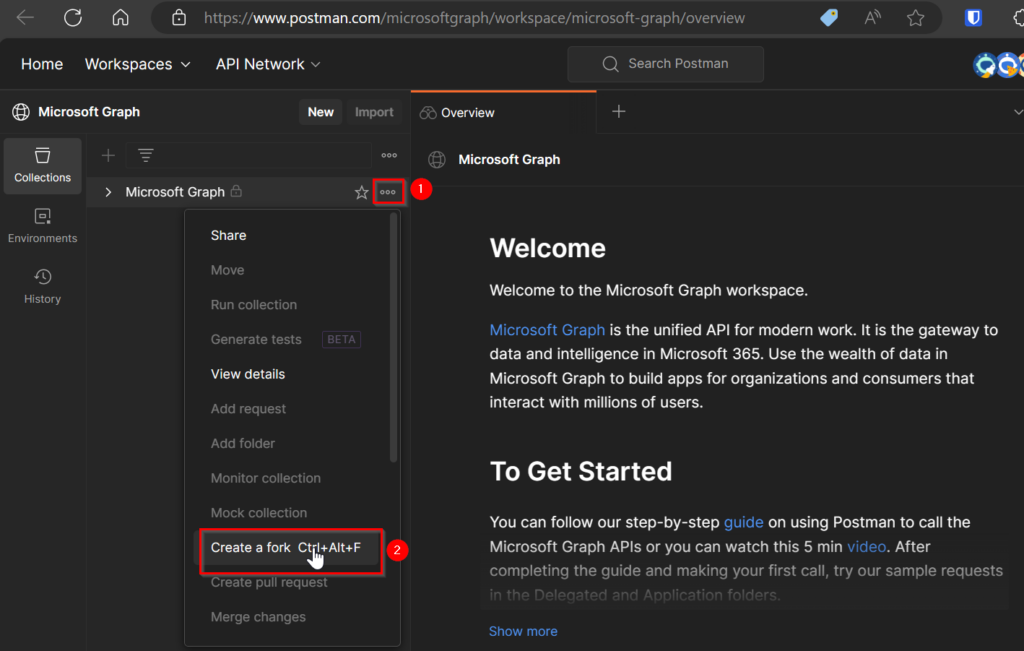
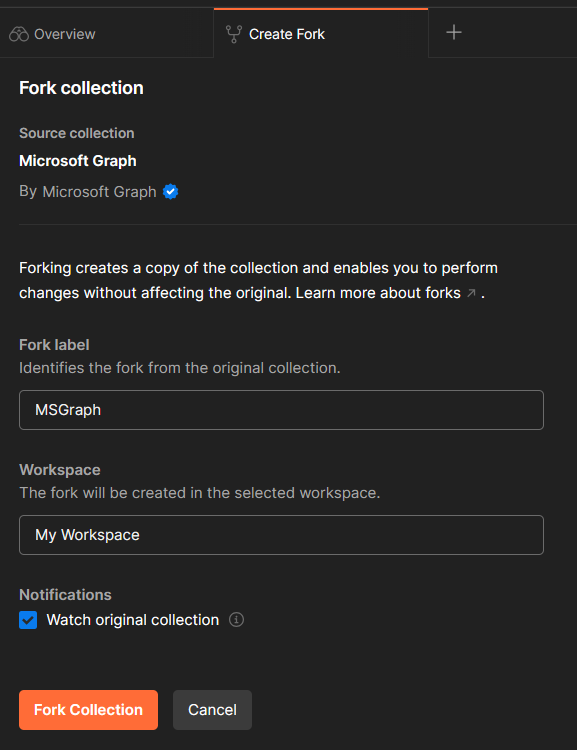
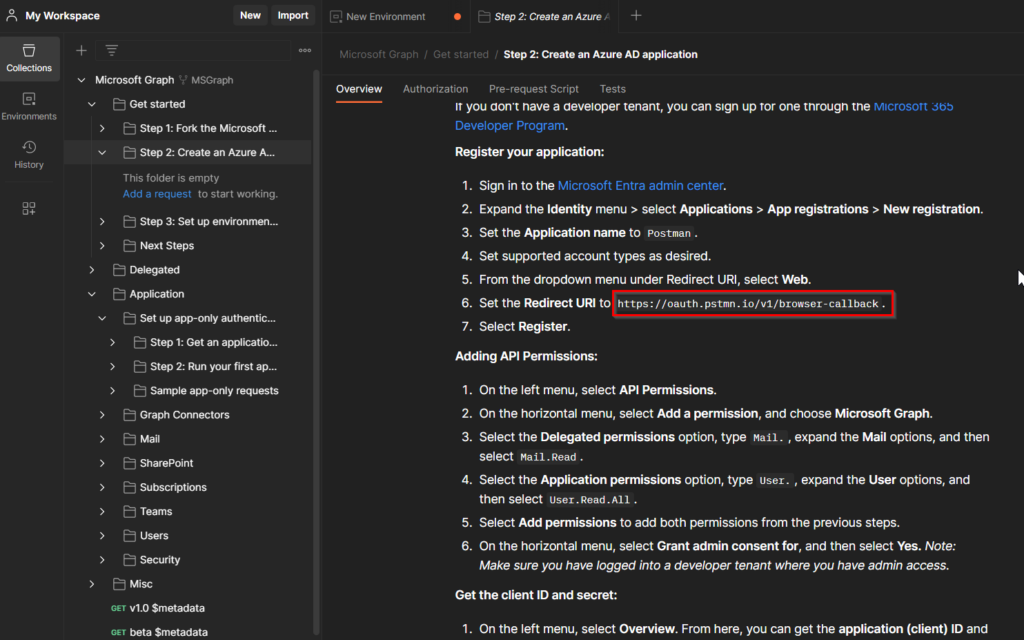
Do this and once your signed in, and got Postman open on your pc, you can continue. - Go to https://aka.ms/graphpostmanwkspc and create a fork of this workspace.
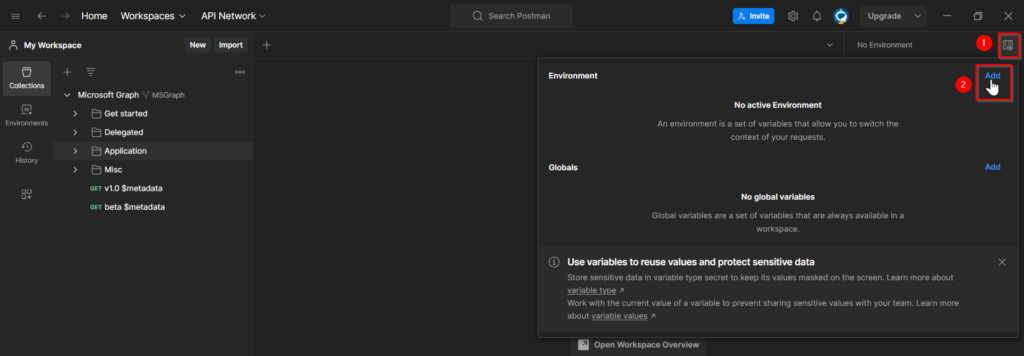
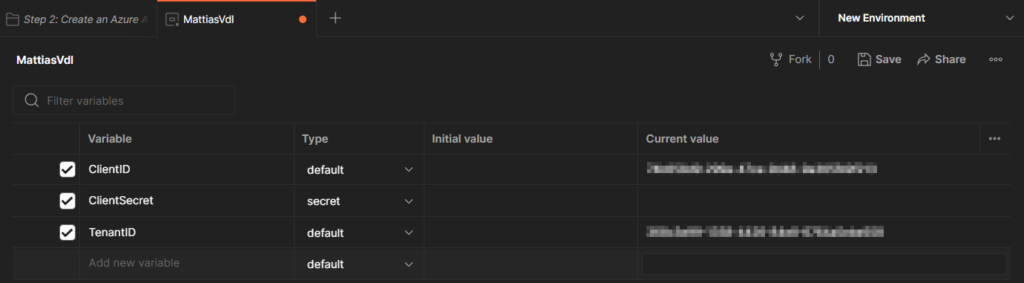
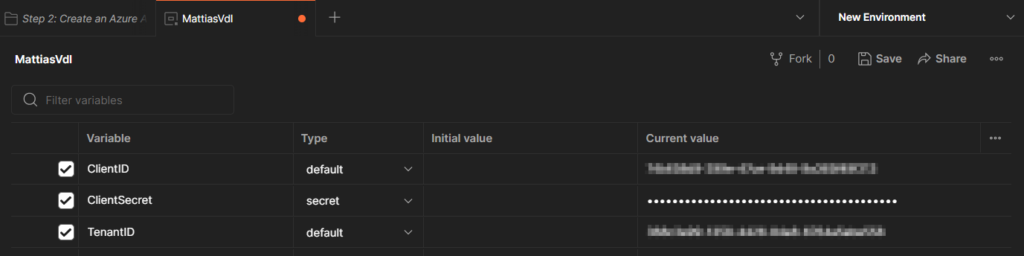
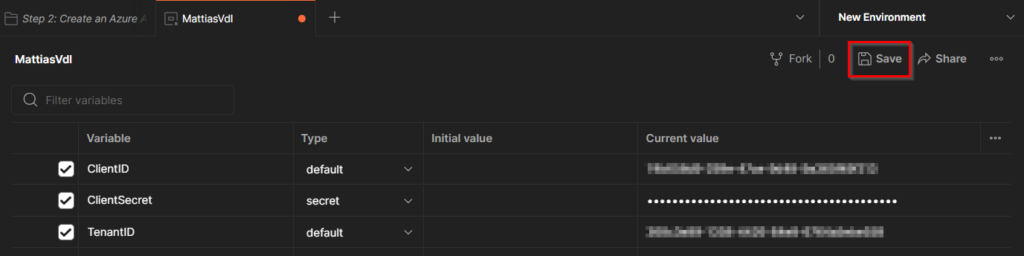
- Open de desktop app of Postman and add your “Environment”.
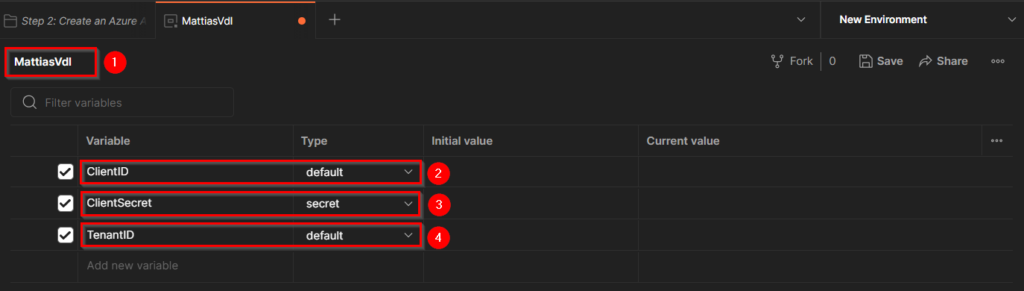
Change the name of the environment to something you’ll recognise.
In my case I’ve used my tenant name “MattiasVdl”.
Then add the 3 variables we’ll need:
– ClientID
– ClientSecret (I’ve made the Type “Secret” as I prefer the secret to be hidden after it’s entered)
– TenantID
The values you need to fill in here need to be created by creating an new App Registration for Postman.
- Create a new App registration in Microsoft Entra.
Give it a name, and don’t forget to set the “Redirect URI” to “Web” and https://oauth.pstmn.io/v1/browser-callback
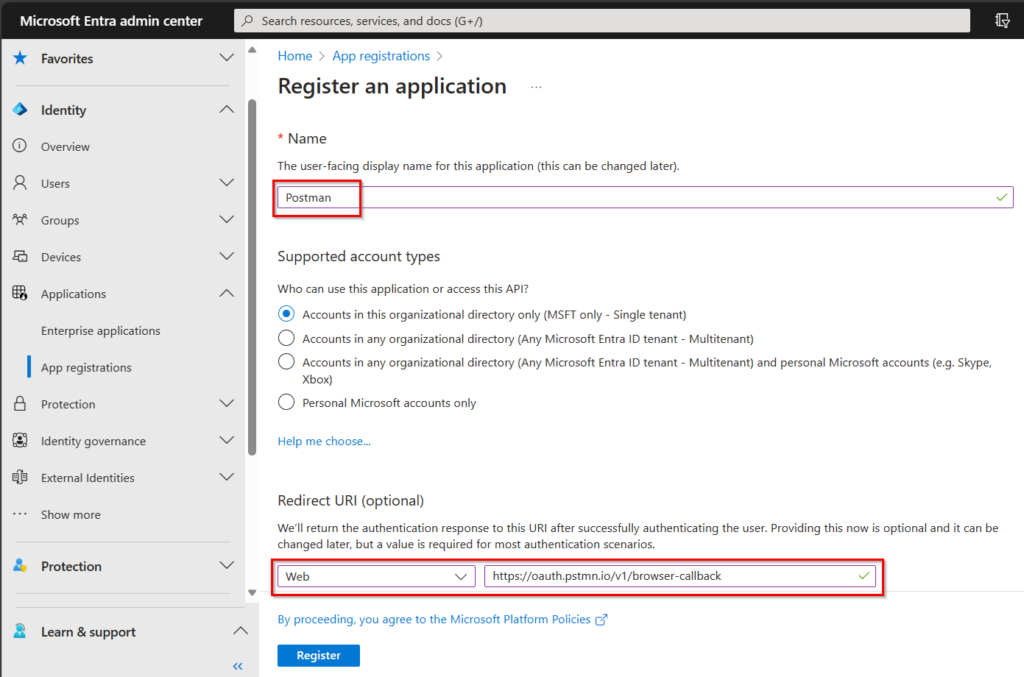
This is also described in the “Get Started part in the Graph Workspace you just forked.
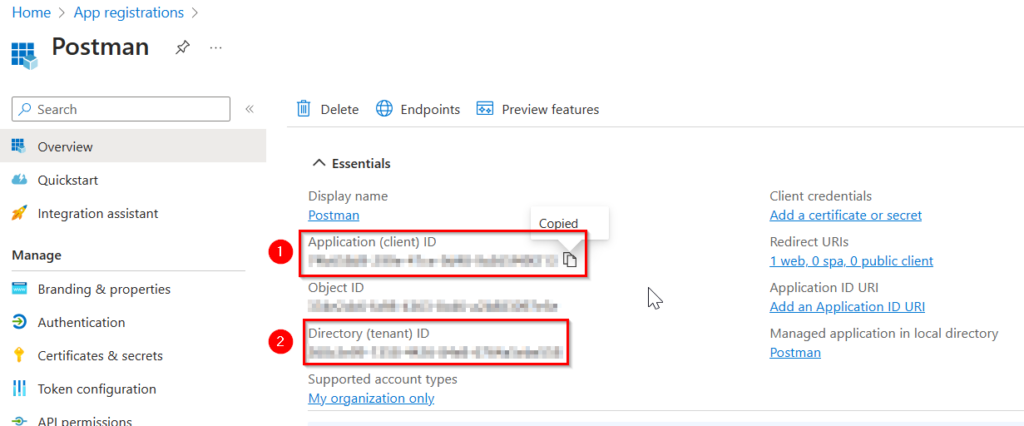
- Copy the “Application (client) ID” and paste it under “ClientID” in the Environment you created.
Do the same for the “Directory (tenant) ID” which needs to be pasted under “TenantID” in the Environment.
Specify the API permissions for this app.
You can delete the default “User.Read.All” permission with Type “User”.
Then add the following 2 “Application permissions”:
– AuditLog.Read.All
– User.Read.All
After adding these permissions you’ll have to Grant admin consent for MSFT.
For this you’ll need a Global Administrator.
- Now we’re only missing the “Client Secret”.
For this we’ll need to create a new “Client secret” for the App registration we made.
- Copy the “Value” of the client secret you created, and paste it under “ClientSecret” in your newly created environment in Postman.
Make sure to copy the Client Secret immediately, as it will be hidden automatically after the admin logs off, and possibly after some time.
It’s not possible to retrieve this secret afterwards.
In case you forgot to copy the secret value, and it’s hidden, you’ll have to create a new one.
Also remember this secret is only valid for the specified period.
You will need to create a new secret after this period if you want to keep using the script.
- Don’t forget to Save the configuration of your Environment
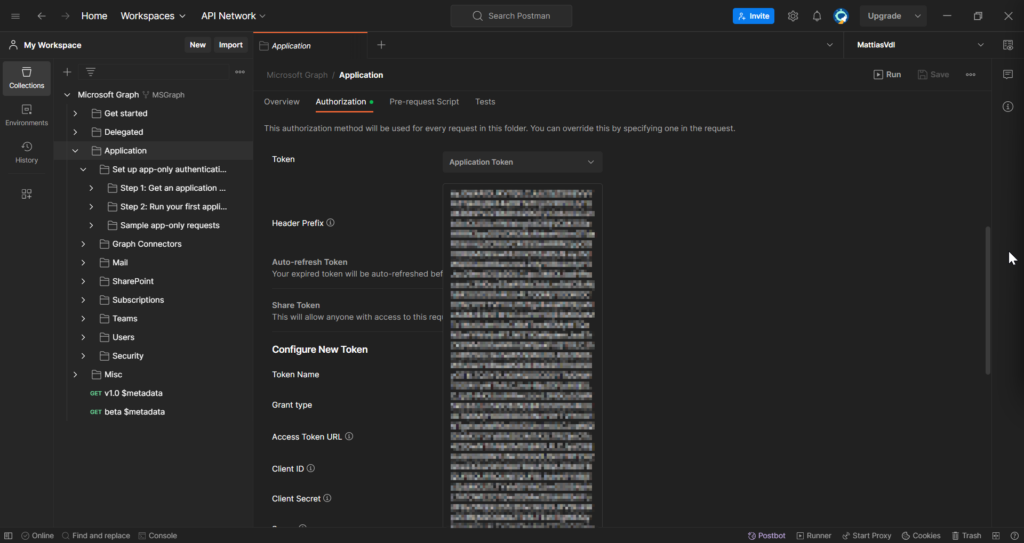
- Make sure you have your Environment selected on the top right in Postman, then go to the “Application” folder in the fork you created and go to the tab “Authorization”.
This is where we’ll have to request our token to be allowed to make the calls to the Graph.
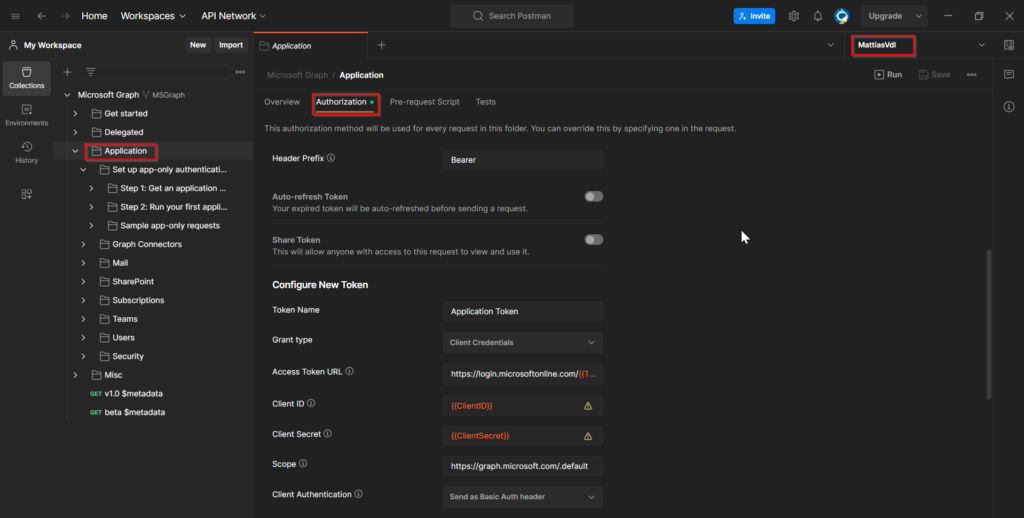
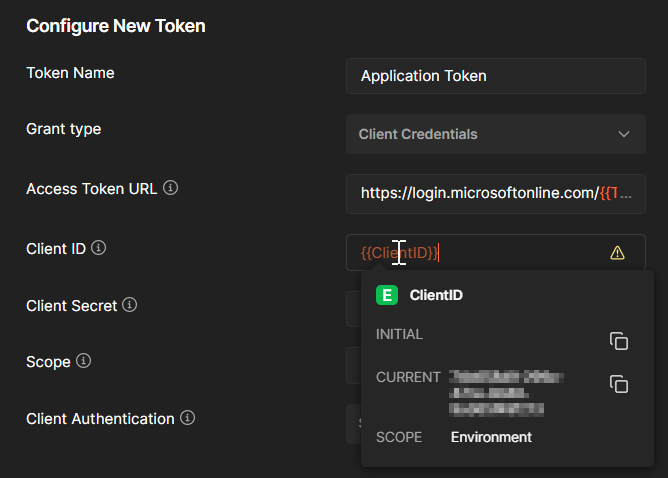
- When you hover over the text in red, you’ll notice the values of your environment are being used.
- Scroll all the way down and click on “Get New Access Token”
You should receive this notification.
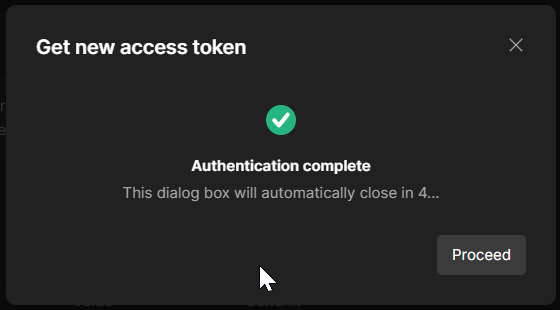
- Click on “Proceed”, and you’ll see the token.
Click on “Use Token”
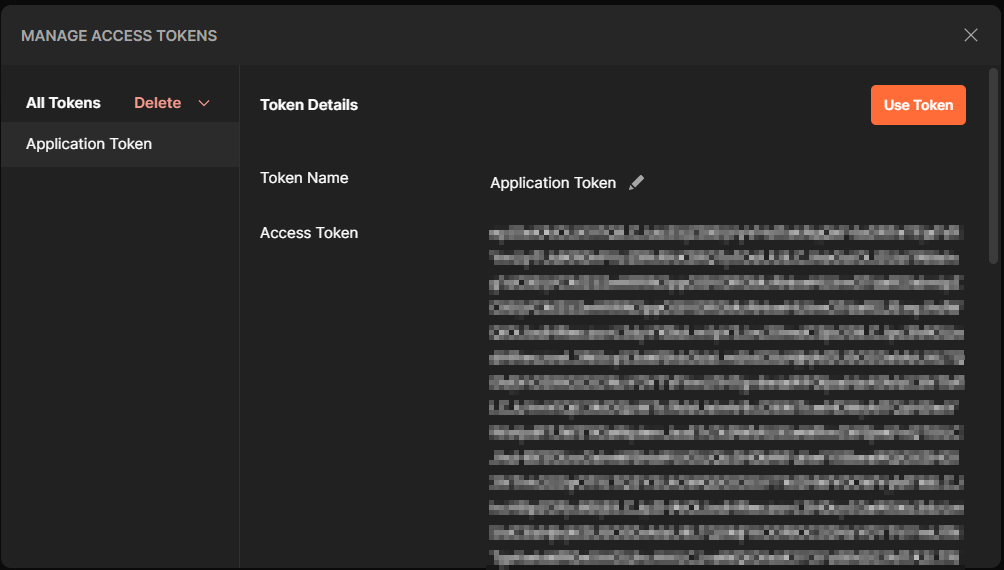
- Now you should see the token is saved in the application
- Everything is set up now to make the request for the data through Postman.
First I create a new folder under “Application” in my fork of the Microsoft Graph.
In this folder I’ll save my own requests.
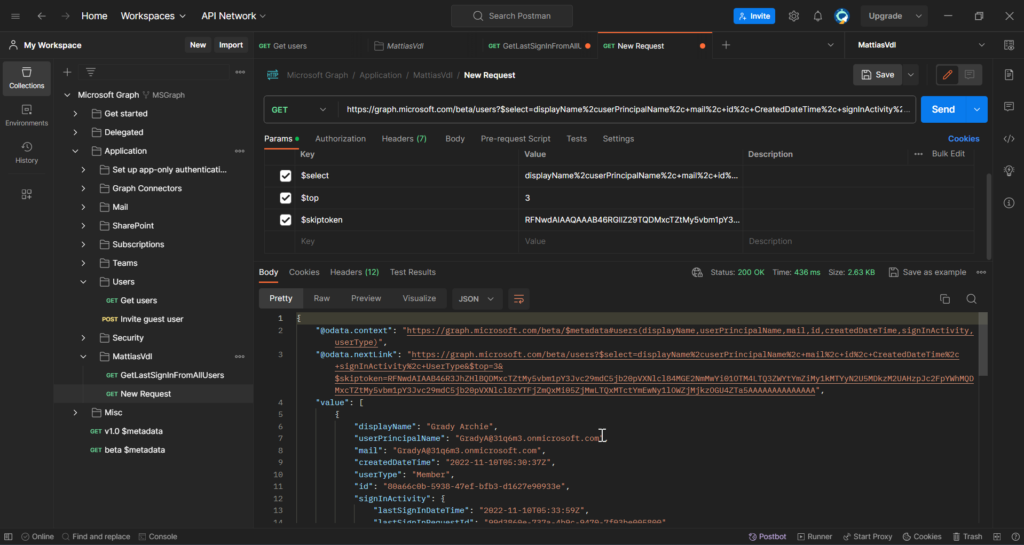
Here you’ve got an example of the request I created and executed in Postman.
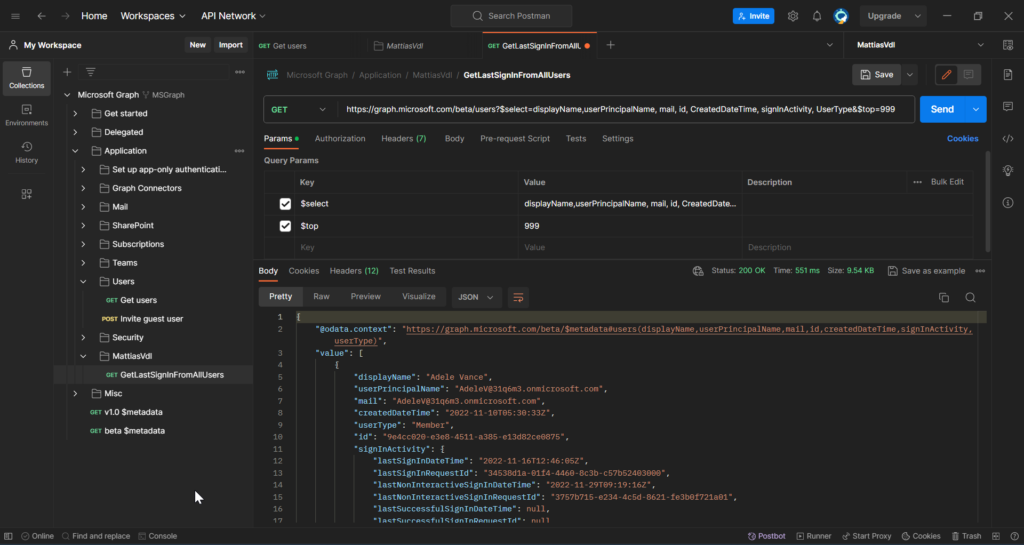
- The results we get back from Postman are in .json format, so you’ll have to convert it in case you want it in another format.
Also, this method does not load all row, but limits it to the top 999 in this case.
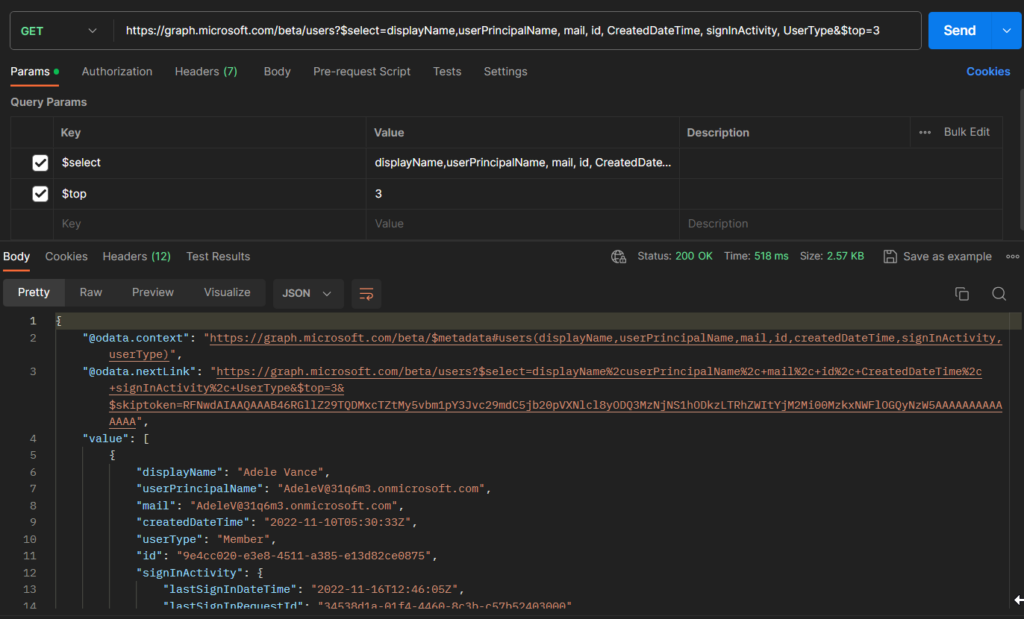
Exporting many more than 1000 records is not recommended.
Instead you should use paging, which will then add “@odata.nextlink” to the export, to link you through to the request which will give you the data for the next x-number of records.
Example below:
Sources
- Graph Explorer | Try Microsoft Graph APIs – Microsoft Graph
- Response of “JanardhanaVedham-MSFT” on this post on the Microsoft Learn site.
https://learn.microsoft.com/en-us/answers/questions/658043/export-of-graph-query-results
- Response of “JanardhanaVedham-MSFT” on this post on the Microsoft Learn site.